No Products in the Cart
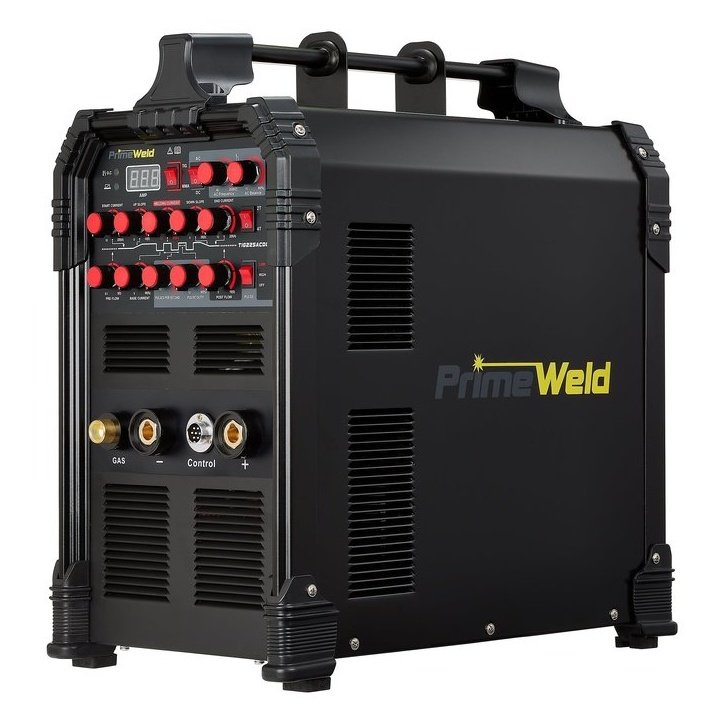
The PrimeWeld CT520D 50A Plasma Cutter Welder Combo is the most cost-effective way on the market to start fabricating. This portable plasma cutter puts a TIG welder and a stick arc welder on your workbench.
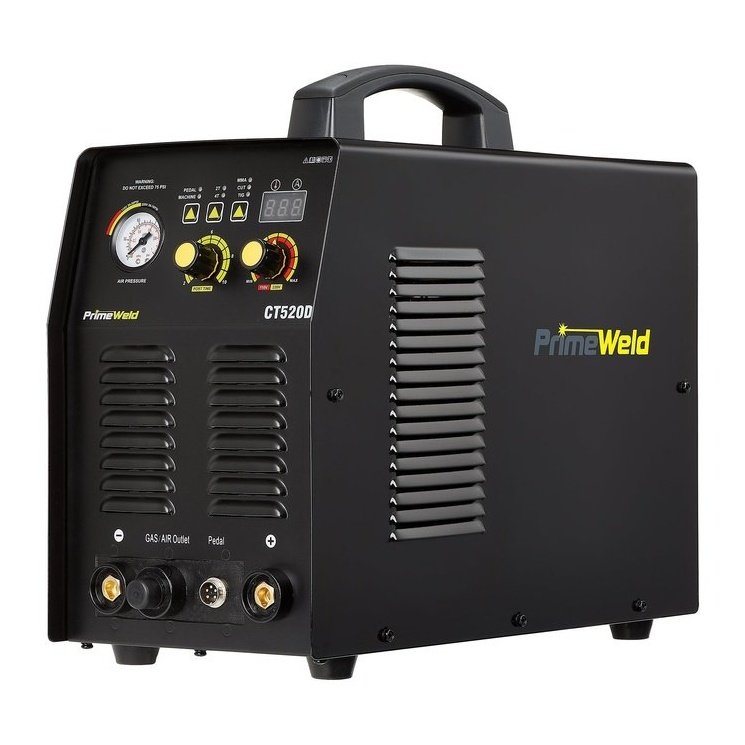
You’re getting three welders in one box that delivers the ability both to cut and weld. Improve your productivity by reducing your movements. Cut parts from stock and weld them into your creations on the same bench just minutes apart.
The CT520D Plasma Cutter Welder Combo runs on either 120 volts or 240 volts, a convenience that allows you to plug in and start building and repairing things just about anywhere. At 120 volts you can run TIG on sheet metal as thin as 24 gauge and still cut a 1/4-inch steel plate. When it’s plugged into 240 volts, the 160-amp stick and 180-amp TIG process weld up to a 1/2-inch plate, and the workhorse CT-520D can cut that, too.
PrimeWeld offers an optional heat control pedal that controls the TIG and plasma arc levels. Start cutting and welding with ease by touching the electrode to the material surface briefly, pulling the trigger, and you’re fabricating.
Increase productivity and produce better quality with arc force control. The arc force control dynamically maintains arc characteristics on the fly while you weld, delivering a stick welding process that’s much more intuitive and forgiving. Spend more time concentrating on your welding instead of worrying about machine settings and worksite conditions.
PrimeWeld designed every welding machine to allow you to weld longer. The CT-520D Plasma Cutter Welder Combo features uphold this standard. Get dual-voltage convenience, triple-threat versatility, and lots of fabrication power to your workshop at an excellent price.
PrimeWeld Customer Service connects you with our knowledgeable team in just minutes. If you have any questions or issues, our knowledgeable, professional staff will get you welding and keep you welding no matter which PrimeWeld model you choose.
CT520D PLASMA STICK WELDER COMBO INPUT/OUTPUT SPECIFICATIONS |
|
IGBT Inverter Type: |
IGBT |
Voltage/phase: |
Dual Voltage 120/240 1 Phase |
TIG output type: |
DC only |
TIG Start Type: |
High-Frequency Only |
Pulse: |
No |
Plasma Cutter Arc Start Type: |
High-Frequency |
Pilot Arc: |
No |
OK-to-Cut Indicator / Low Air Pressure Safety: |
No |
OCV: |
|
Max Inrush (|1MAX) Amps: |
|
Maximum Rated (|1EFF) Input Amps: |
|
TIG Output Amps/Volts @ Rated Duty Cycle: |
120V:
240V:
|
Stick Output Amps/Volts @ Rated Duty Cycle: |
120V:
240V:
|
Plasma Output Amps/Volts @ Rated Duty Cycle: |
120V:
240V:
|
TIG DC Amp/Volt Range: |
|
Stick Amp/Volt Range: |
|
Plasma Amp/Volt Range: |
|
Preflow Time: |
Fixed |
Post Flow Time: |
Fixed |
OverCurrent Protection: |
Yes |
Duty Cycle Protection: |
Yes |
Air Pressure OK Safety Indicator: |
No |
Stick Arc Force Control: |
Auto-Adaptive |
Torch Type: |
t AG-60 High-Frequency |
Recommended Cutting Air Pressure: |
55-60 psi |
CT520D Plasma Stick Welder Combo Front & Rear Panel Switches & Features |
|
1. |
Overheating indicator illuminates when the working temperature of the IGBT is overly high. Meanwhile, the machine stops working. |
2. |
It is the current indicator, lighting when machine power on |
3. |
LED Current Display |
4. |
Amperage Control Knob |
5. |
Time adjustment for post air |
6. |
Air Pressure Gauge.Suggest Air Range: 45-70PSI |
7. |
Machine indicator, Current knob can use in this selection, can not use pedal. Pedal: current knob on the machine can not be used in this selection, can use the pedal to adjust the current. |
8. |
4T is selected press and release trigger Arc starts, press and release trigger Arc stops. 2T is selected press trigger Arc starts, release trigger Arc stops. |
9. |
TIG function please select it before using the machine Cutting function please select it before using the machine Stick function please select it before using the machine |
10. |
Stick connector |
11. |
TIG and cutting torch connector |
12. |
Switch connector for TIG and Cutting torch |
13. |
Earth clamp connector |
14. |
Air regulator |
15. |
Power switch |
16. |
Quick air connector |
17. |
Power cable Input Voltage 110/220v, Voltage Automatic Identification, no need to hand switch |
18. |
Argon gas in |
19. |
Air in |
20. |
To Air Meter |
Indicates actual amp output while welding. While adjusting or not welding, the function of the display changes to display the selected amperage.
The On indicator should always be lit while the unit is plugged in and the power switch is switched on. If the Overcurrent light is lit, turn the unit off and check for possible causes including undersized cables, poor connections, and overheating cables. If the Duty Cycle is lit, do not turn off the unit until it has had sufficient time to cool (10-15 minutes). Cycle the power switch to reset the machine only after the machine has had time to cool. The Duty Cycle and the Overcurrent warning lights should go off after cycling the power switch on the machine. If it does not, contact us.
This switch determines which mode controls the unit, the torch switch (Panel) or the pedal. Using either one will determine how the unit reads and sets the maximum output of the machine.
This switch selects processes. Do not switch this switch while welding or cutting, Do not switch it with the wrong torch connected or immediate failure of the unit may result. Improper polarity can contribute to torch failure as well. Make sure all connections are installed properly before cutting or welding.
Controls amperage while welding or cutting by using the knob to preset maximum amperage.
Sets the post flow time of the shielding gas while welding in TIG mode. While in plasma (cut) mode, it sets the post flow time of the air. Time is an approximation only and can vary a little from the setting posted on the dial. The air or shielding gas may stop flowing before full maximum time is reached. Consider the maximum setting mark a reference guide only.
This connection is only used with the plasma cutting torch. The small ringed wire connects here. Unscrew the plastic thumb nut and attach the wire to the post. Reinstall the thumb nut over the wire with finger pressure only. Do not overtighten
Location of the negative terminal connection. Dinse-style. For Stick: Work Clamp Connection. For TIG: Torch Connection. For Plasma: Torch Connection.
Connects the shielding gas to the TIG torch. To connect: Push the torch fitting into the connector until the collar slides forward with a click. To Release: Slide the collar back and it will automatically release. Do not turn or twist the connector.
Connect the foot pedal or torch switch to this socket to control the welder. Only the foot pedal or torch control connector can be plugged in at one time. If the torch has a torch switch feature, tie the loose connector back and leave it disconnected while using the pedal.
Location of the positive terminal connection. Dinse-style connector. For Stick: Torch connection. For TIG, Plasma: Work Clamp Connection.
Use the air pressure to measure air supply pressure for the plasma cutting process only. The pressure is irrelevant while being used for TIG welding, although some pressure may register while the gas is actively flowing. Supply air pressure should not exceed 85 psi from the air compressor or internal leaks may develop. Adjust the operating pressure while air is flowing. Adjust the air pressure to 55-65 psi and increase or decrease pressure from there to achieve optimum cutting results while air is actively flowing. To adjust air pressure with torch, briefly fire torch with post flow set to maximum. Adjust air flow while the air is still flowing. Use air only for cutting. If a large differential in air pressure is observed (more than 10-12 psi), check for restrictions, kinks or blown connections. If all checks out ok, you may need to use a larger diameter supply hose or compressor.